Are you suffering a slowdown on your Mac? Will you just have the unused Picasa lying idle on your Mac taking much operating space? What will you do and in what ways will you remove Picasa from your Mac to save some space and ease the slowdown problems of your Mac? Here are two available ways which will help you to perform a thorough removal of Picasa.

Part 1: how to remove Picasa from your Mac manually
When speaking of how to remove Picasa from Mac, many users might have the regular removal method in mind, that is to proceed a simple drag-and-drop to have Picasa disappeared from Finder. Yet such kind of removal will lead to various problems such the slowdown or crashes of Mac caused by unknown reasons. Then what is the proper way to remove Picasa from Mac OS X completely and safely without causing any problems?
To completely remove Picasa from Mac manually, there are some demands you have to meet:
- To make the Picasa icon disappeared from your Finder
- To detect the preferences files, application support files and all other associated files of Picasa and trash all of the files
- To empty your Trash to clean up your Mac creating more space for Mac’s operating
Thus it is obvious that you haven’t finished your removal when you just drag the icon to the trash and even empty Trash. Now let’s get started to learn how to remove Picasa via a regular way.
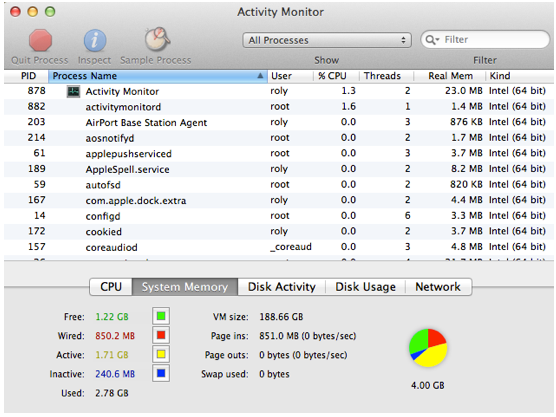
- Step 1: Stop running the process of Picasa,. You can make it in different ways. Open Activity Monitor, change the filter into “All Process”, click on Picasa and then click “Quit Process” to end all the processes of Picasa before you remove it.
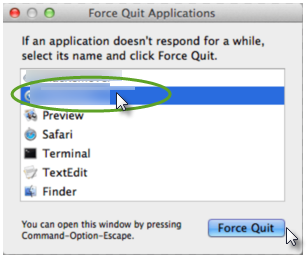
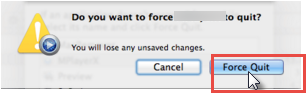
Or alternatively you can hold down “Command+Option+Esc” keys to switch on your Activity Monitor, and perform the similar act to quit Picasa. Click Picasa and then click “Force Quit” and then make confirmation of your operation.
- Step 2: Trash the main file of Picasa. This steps is easy to perform because you can just drag the icon to the trash, an then go on your work to remove Picasa with the following steps.
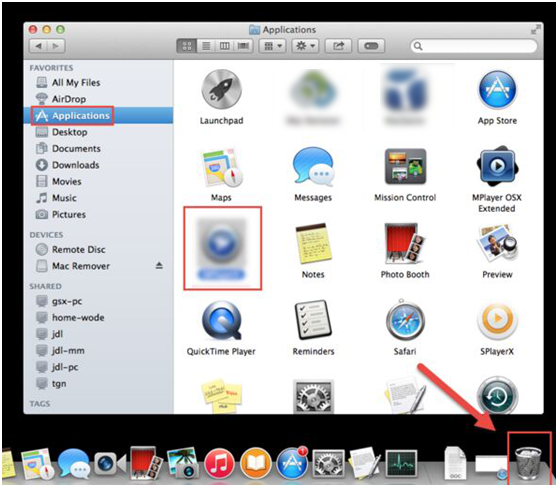
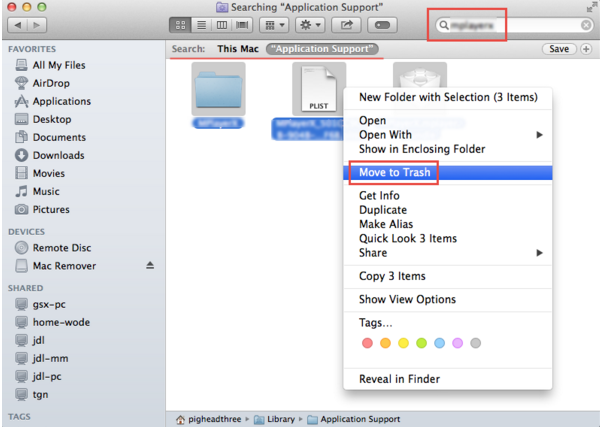
- Step 3: Find out the Preferences files, applications support files, and some other supplementary files of Picasa. Head to Library under Go menu in Finder to search for additional files in these three folders: /Library/ Application Support/, /Library/Preferences/, and /Library/Caches/.

- Step 4: Remove all the files in the target folders above to trash respectively.

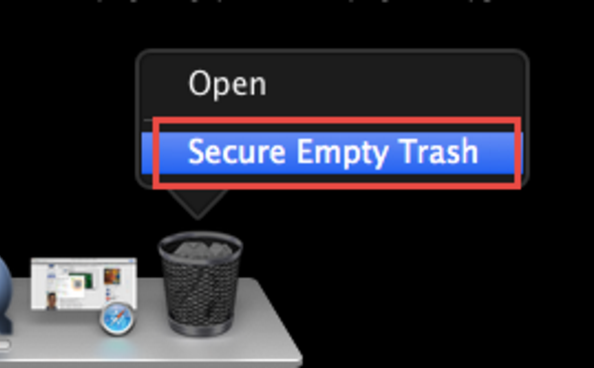
- Step 5: Empty your Trash. Right click on the Trash icon and select “Secure Empty Trash” to completely remove Picasa from Mac. But don’t forget to check whether there are anything deleted mistakenly during your removal before you empty your Trash.
That is all about how to remove Picasa via a regular way. Do you think it easy to perform? Maybe not. Instead of uninstalling Picasa in such a manual way, you can also choose a convenient and automatic way to have your Picasa removed entirely. Just click your mouse and get a free remover, which will guide you to remove Picasa in seconds.
Part 2: Recommended way to remove Picasa from Mac
With a remover installed on your Mac, you don’t need to search for the supplementary files carefully and move the files by yourself, but just click on the buttons on your remover, and then Picasa will be uninstalled within a few clicks. All you need to do is to Click and Wait and Click.
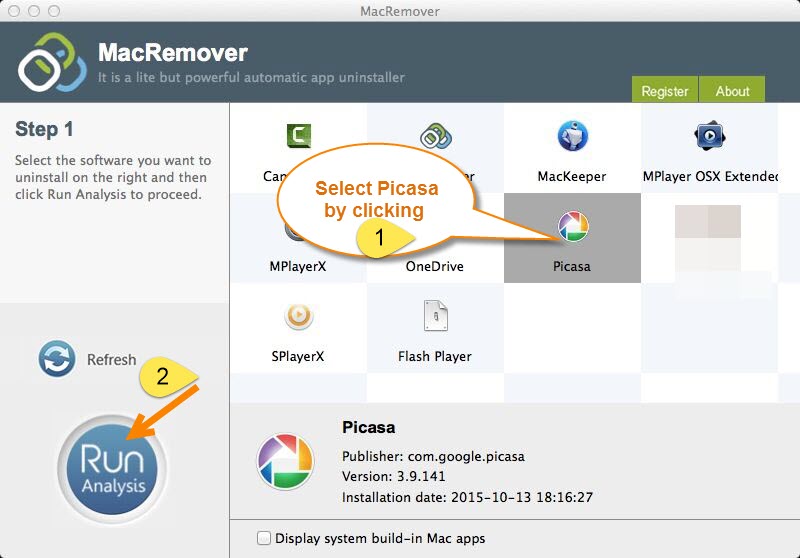
- Step 1: Proceed your remover/ uninstaller via your Finder or on your DOCK

- Step 2: Make a single click on the icon of Picasa, and then click Run Analysis. If you can find your Picasa on the uninstaller infer-face, just click “reflesh” and then click the button Run Analysis. This step will scan out all the supplementary files of Picasa for you automatically.
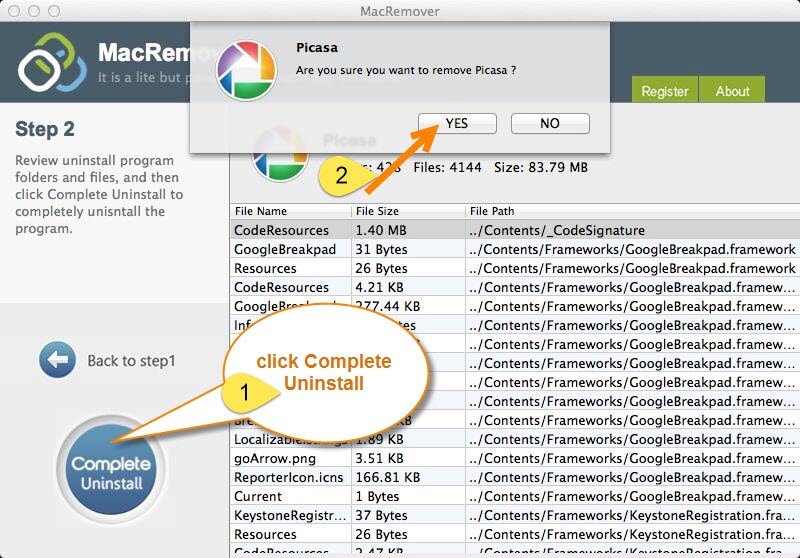
- Step 3: Make two clicks to finish your removal of Picasa. Click “Complete Uninstall” after the remover scanned out all the components of Picasa and displays all the leftovers on the interface.
- Step 4: There are a congratulations interface just to tell you that you have successfully uninstalled Picasa from your Mac completely. Having gone through the previous three steps, now you can just quit the process of the remover and enjoy your time.
Compared with the previous uninstall way, do you think it is easier to remove Picasa via an automatic remover? Considering the complexity of manual removal, removing Picasa with a third party remover is suitable for all levels of Mac users even those who know nothing about Mac uninstall. Therefore, it is strongly recommended to you to adopt an automatic way to perform Picasa removal and any other Mac App uninstall. You’d better to have and keep such a helper on your Mac if you are a application chaser who often needs to uninstall and re-install applications on Mac. Only a complete removal can make you have a re-instillation, so it is worth trying.