
Hi, you may have enjoyed the advantage of Found, it provides a lightning-fast, intuitive search experience that finds files across your Mac and personal cloud services, including Dropbox, SkyDrive, Google Drive/Docs. But you do not care now, or you would not search the Internet, and find how to uninstall Found.
If you are looking for a guide how to uninstall Found on Mac, you have come to the right place. This post will talk about two possible ways for Mac users to uninstall Found. After your reading it, you will have a clear mind about how to get rid of Found. The first way is called manually uninstall Found, namely, get rid of Found by yourself. The second way is called smartly uninstall with a professional uninstalling tool, MacRemover. Let’s have a look at the ways you can get rid of Found once and for all.

Option one: Fully uninstall Found on Mac by yourself
Some Mac users easily drag the program to the Trash and think uninstalling is quite simple. But they might don’t know it is not what we named uninstall, he just move the main files installed with it. So it is important to understand once we install an App, there are some related files install together. If you only delete it from the Finder, there are some leftovers still exist. What you need to do is remove all the related files. Incompletely uninstalling will make your Mac become the storage of unnecessary files and work slowly. After understand the above, we can start our steps about manually uninstall Found.
Step 1: Remove Found from Mac
The operation can help you remove Found on Mac: Open the Applications folder in the Finder, and find out the Found icon you need to uninstall, then drag the file icon to the Trash in the dock.
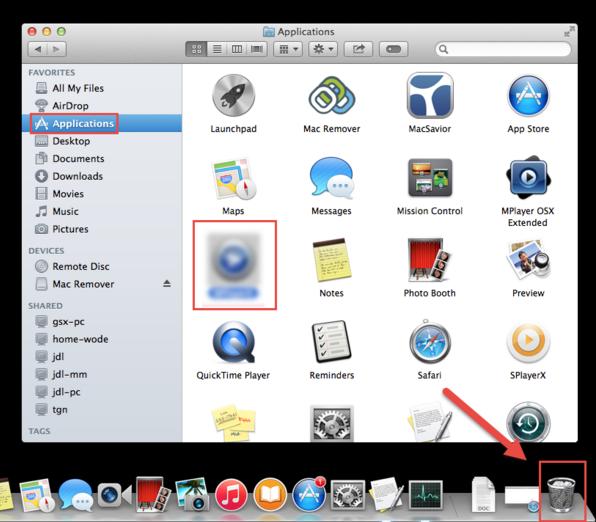
Also you can highlight this App with a single click and move it to the Trash by pressing Cmd+ Del on your keyboard. Note: If the Found can be found in the dock, you can directly drag it from the desktop to the Trash.
Now you have remove Found successfully, but this process do not uninstall Found thoroughly. Many Found’ extra files are still on Mac. These files occupy its space and influence your usage of Mac. You do no need to leave it to make your Mac filled, it is high time for you to uninstall all of the files related with Found.
Steps 2: Find and remove leftovers that is attached to Found
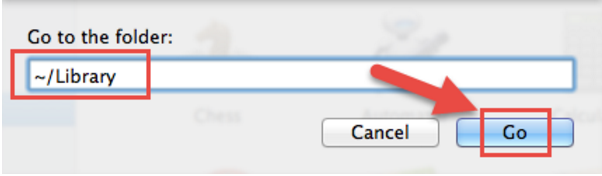
Open the finder, go to the Menu Bar, open the “go” menu, select the entry: | Go to Folder… And then enter the path of the Application Support folder: ~/Library
Search for any files or folders with the name of application or its vendor in the ~/Library/Preferences/ , ~Library/Application support/ and ~/Library/Caches/ folders. Right click on those items and click Move to Trash to delete them.
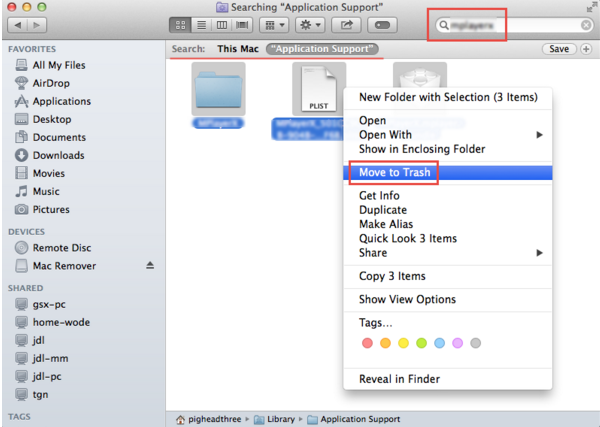
Moreover, You have to find all the leftovers by yourself. They can be located in the following folders.
- ~/Library/Preferences/.
- ~/Library/Application Support/.
- ~/Library/Caches/ Folders.
Once you have removed all Found’s extra files, this App can be considered to be removed. Do you think it is over? No, the last step you need to do is empty the Trash, then you can get rid of Found fully.
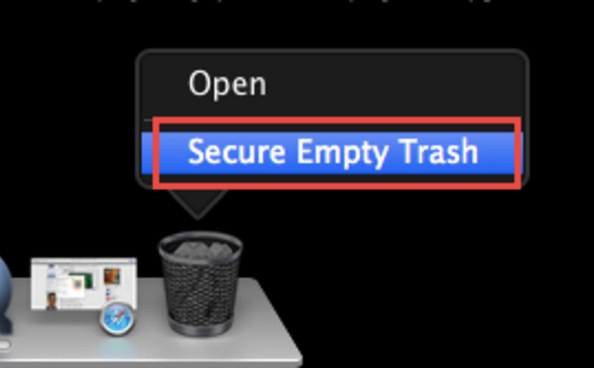
Step 3: Empty the Trash to get rid of Found permanently
If you never use Found again, we suggest you empty the Trash to uninstall Found permanently. In order to empty the Trash, you can right click on the Trash icon, select Empty Trash, and then click Empty Trash to confirm.
That all the process you need to do, the manually uninstalling way is suitable for any other Apps, such as Eclipse, Microsoft Outlook. Uninstalling Found by yourself needs you spend some time, luckily, you have a chance to improve the situation. The second way – uninstall Found by MacRemover, a smart uninstalling tool. Manually uninstalling needs much more time than uninstalling with MacRemover.
Option two: Uninstall Found from Mac with MacRemover
MacRemover is a lite but powerful application that helps you thoroughly uninstall unwanted Apps form your Mac. It helps you find out every components of the unwanted application, safely and completely remove them. Let’s have a look at how it works for us.
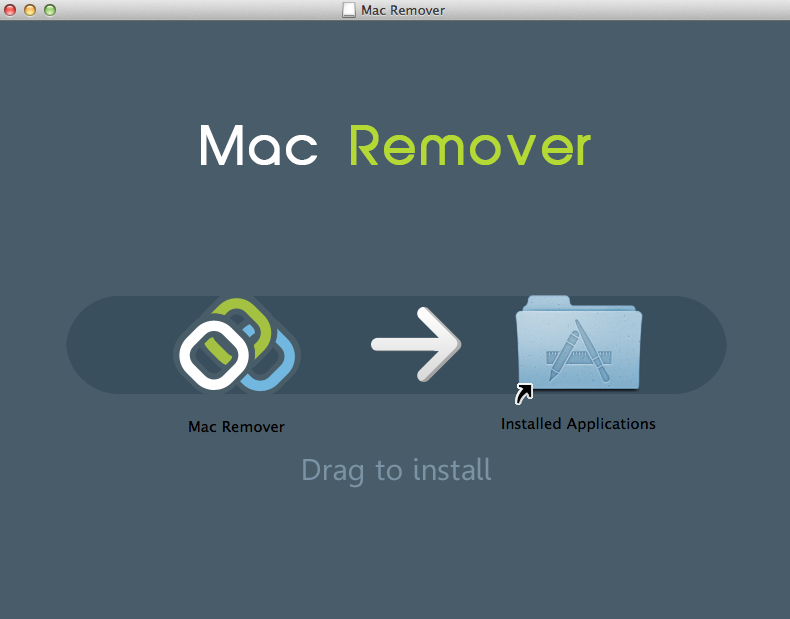
Step 1: Download MacRemover(free for download), drag its icon to the Application folder to finish installing. It is a easy and pleasant process.
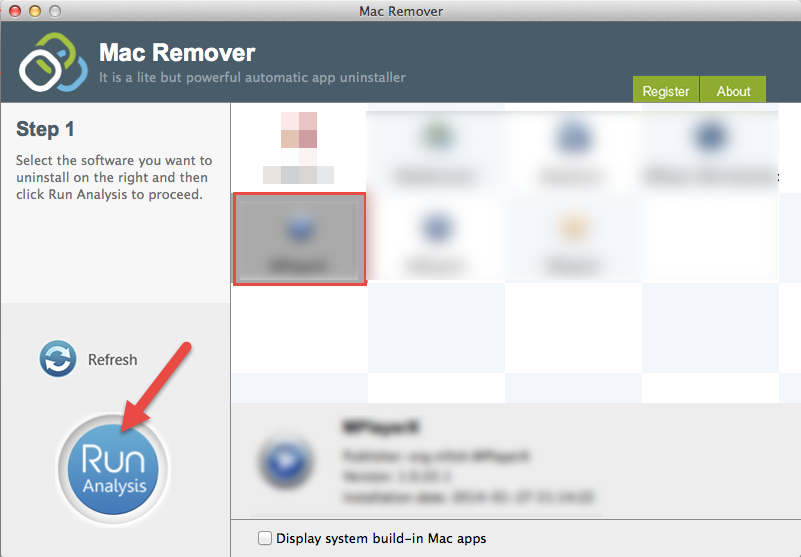
Step 2: Open the Launchpad, try to find Found icon from the App list, then Launch MacRemover. Select it and click Run Analysis button to proceed.
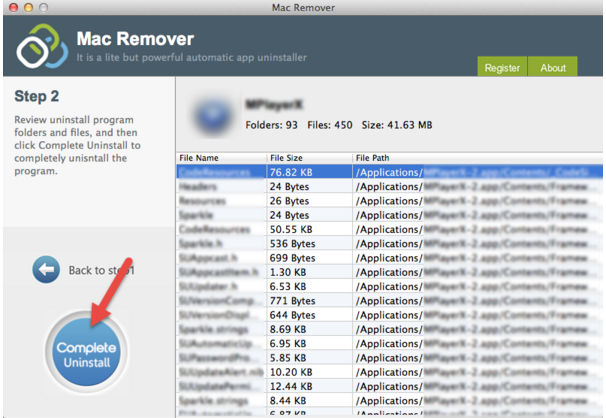
Step 3: MacRmover will review related files and folders, then you can click Complete Uninstall button.
Steps 4: You will receive a message which states that “Are you sure want to remove Found?”, click “yes” to confirm uninstall Found. Then a new window will display to inform you that you have been Uninstalled Found successfully.
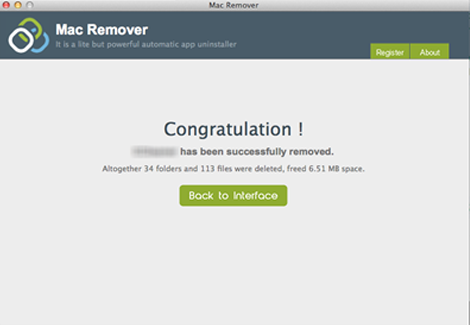
Well finished! It is easy, quick, and most importantly, effective. Except uninstalling Found, MacRemover helps you uninstall an Apps in a few seconds. MacRemover is your best choice to uninstall Apps effectively. There is no need spend time on searching how to uninstall Found, have a try for MacRemover, you will feel surprised. Best wishes to you.