
Office software always occupies an important position in business. Since Microsoft has released the latest version of Microsoft Office, some users may need to remove Microsoft Office 2011. Removing application on Mac OS X seems difficult for many Mac users. Therefore, today we are going to share something useful to help you completely remove Microsoft Office 2011.

Typically, all methods to remove Microsoft Office 2011 can be divided into two kinds: the manual way and the automatic one. For users who have tried both ways, the biggest differences between the manual way and the automatic one lies in how much time you need to spend, how many steps you have to cover, and also the complexity. Now this article will show you how can you remove Microsoft Office 2011 on Mac OS X with both manual and automatic ways.
The Manual way to remove Microsoft Office 2011
As we all know, Microsoft Office 2011 is a suite, which contains Microsoft Word, Excel, Outlook and so on. When you decide to remove Microsoft Office 2011, you have to ensure all the applications and all the associated files of those applications in Microsoft Office 2011 will be uninstalled entirely.
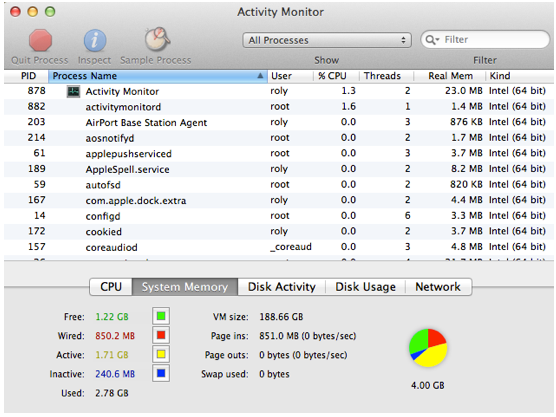
- Step 1: Exit all the process of Microsoft Office 2011 to make your removal smoothly. Switch on the Activity Monitor, change the filter into“All Process”, click on Microsoft Office 2011, or any active process of it, click “Quit Process”.
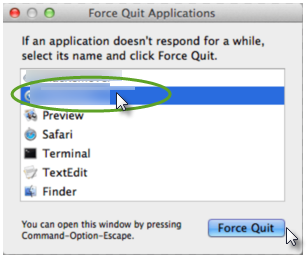
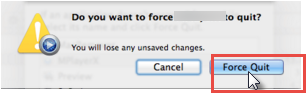
Another option to end the process is to pressing “Command+Option+Esc” on your keyboard, and then click on the target applications, click “Force Quit” and then confirm your operation in the pop-box.
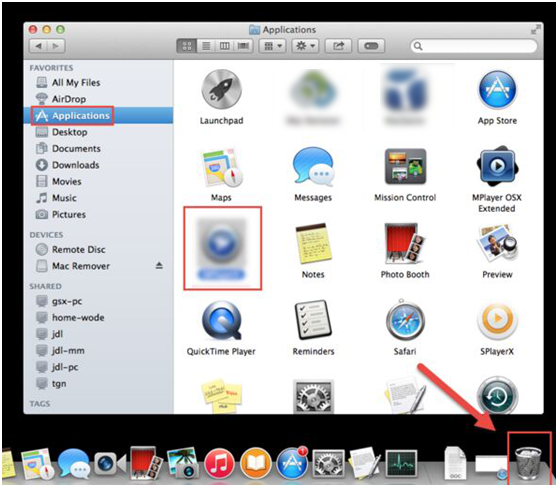
- Step 2: Delete the main file of Microsoft Office 2011 by dragging the icon to the Trash.
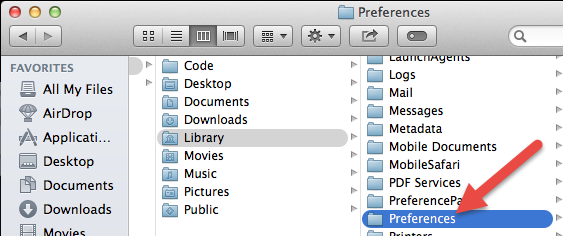
- Step 3: Locate the “hidden” folders which stores all the components of Microsoft Office 2011. Go to Library by click on Go menu, or click Home under the Go menu, and then navigate to Library and then detect folders named /Preferences/, /Caches/, /Application Supports/.

- Step 4: Trash all the components of Microsoft Office 2011. . Search for the target folders under Library menu, i.e /Preferences/, /Caches/, /Application Supports/. Take Preferences as example, when you open the folder, find out and delete all files related to Microsoft Office 2011 (files with a name containing com.microsoft) , such as files as below:
com.microsoft.Excel.plist
Com.microsoft.office.plist
Com.microsoft.office.setupassistant.plist
Com.microsoft.outlook.databasedaemon.plist
com.microsoft.Outlook.plist
com.microsoft.PowerPoint.plist
com.microsoft.Word.plist
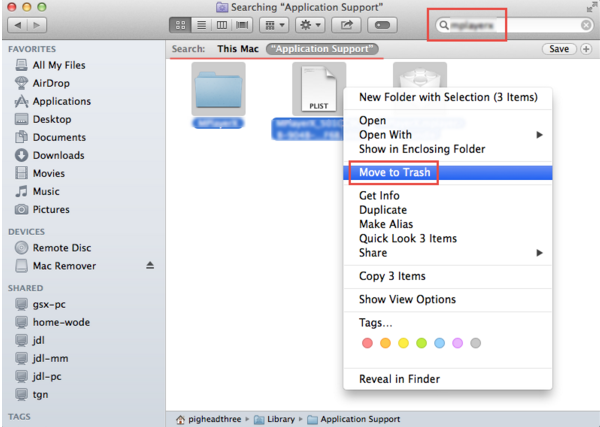
Select all those files and then move them to the Trash.
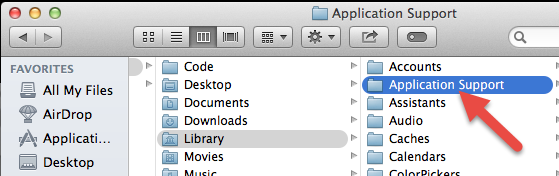
Having finished the removal of Preferences, you need to go back to Library, and perform the similar steps to remove all files in folders called Caches, Application Support, and trash the corresponding files to the trash.
- Step 5: Remove all Microsoft Office applications icons from your DOCK. Right click the icons on your DOCK, click “Option”, and then select “Remove from DOCK”.

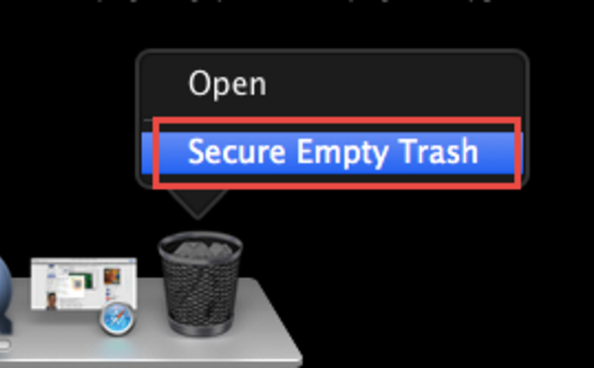
- Step 6:Clear the Trash. Check whether there are something important in your Trash and move out of it, and then right click on the Trash icon, select “Secure Empty Trash”and then make confirmation in the following interface.
The manual way acquires you to cover totally six steps to finish the removal of Microsoft Office 2011. What about the automatic way? Continue your reading.
Recommended way to remove Microsoft Office 2011
Compared with the complex manual removal way, the automatic one is easier to conduct and costs less time. Yet before you start your removal, you need to get a smart tool, which will help you perform the uninstall. You can install the smart tool onto your Mac for free, and then experience a quick uninstall of Microsoft Office 2011 on Mac.
- Step 1: Double click and run the smart tool in Finder

- Step 2: Select Microsoft Office 2011 on the interface with a single click, and then click “Run Analysis” button, which will scan out all the components of Microsoft Office 2011 automatically.

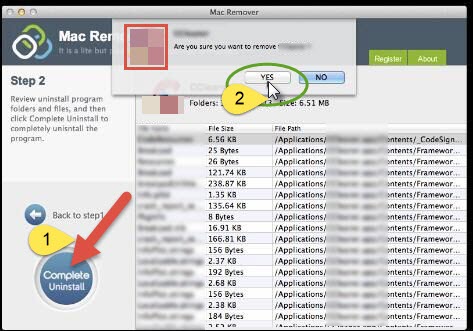
- Step 3: Click “Complete Uninstall” and then click “YES” in the pop-up box to finish all your job to completely remove Microsoft Office 2011.
All above is how can you remove Microsoft Office 2011 on Mac OS X completely in a manual way as well as an automatic way. Obviously, the latter way is easier to perform for all levels of Mac users, and save lots of time for you. Thus it is strongly recommended to you to adopt the automatic way to conduct a complete uninstall of Microsoft Office 2011.
Mac uninstall is a tough job for those who know little about it. However, when you have a smart tool, you can remove any unwanted application on your Mac and clean up all the leftovers after your removal. Therefore, it is better for you to keep such a helper on your Mac in case you need to remove some stubborn applications. Incomplete uninstall leave much troubles for Mac, the remaining will take up the space of your Mac leading to a slowdown or crash sometimes. So, if you need to remove some useless applications, make sure to remove all the components of them.