
When you just need to remove OneDrive in Mac OS X, we do hope that this post is right there for you to help. Here are the available approaches that you can use to uninstall the unwanted OneDrive and detailed instructions you will need to know to perform a complete uninstallation of OneDrive from Mac.

Many Mac users will just drag and drop the icon of OneDrive thinking that’s all about the removal. If you are just one of them, then it is high time for you to learn more available methods to remove OneDrive in Mac OS X.
Completely remove OneDrive in a manual way
It is definitely wrong if you thought the manual way is just like the drag-and-drop act you used to performing to uninstall unwanted programs. Apart from dragging the icon of the program to the Trash, the complete manual way requires more jobs.
Step 1: Quit the process of OneDrive.
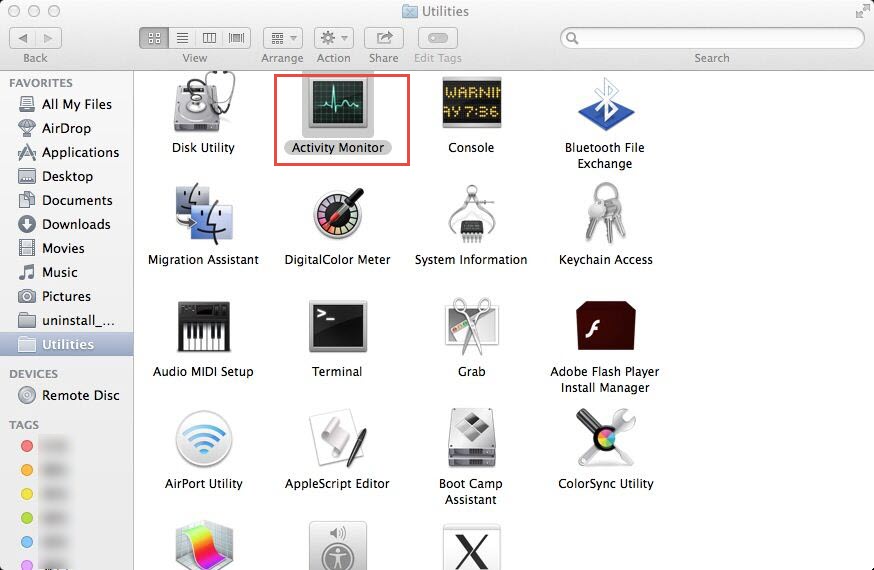
- Open Finder, select “Applications” in the left-hand side bar and then find out the Utilities folder. Enter Utilities folder and then double click on Activity Monitor to launch it.
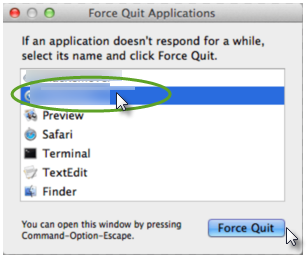
- Search for OneDrive process from all processes, click on OneDrive and then choose “Quit Process” to exit it.

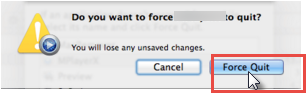
- You can also press down the Command+ Option+ Escape keys to launch the Activity Monitor, click on OneDrive and then select “Force Quit” to end the process.
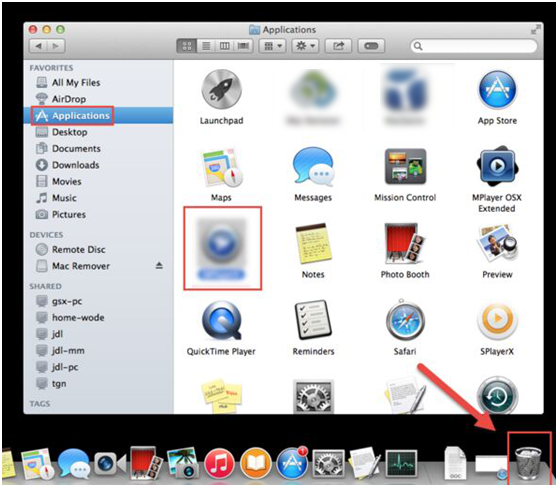
Step 2: Remove the main executive files of OneDrive by dragging the icon to the Trash.
Step 3: Locate and move all the leftovers of OneDrive to the Trash.
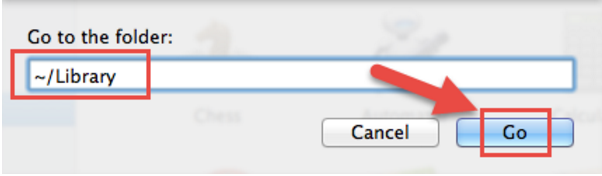
- Open Finder, click on “Go” menu and then select “Go to folder”.
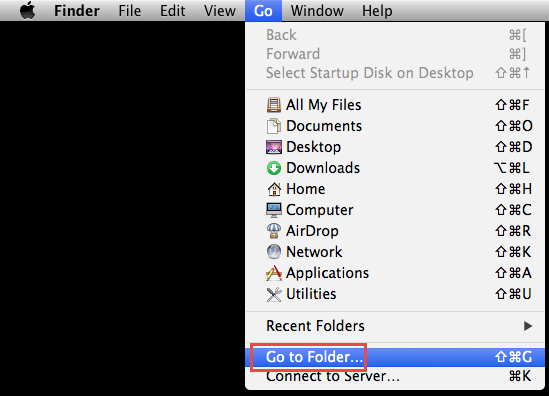
- Enter “~Library” in the search box and then click on “Go” to head for the Library folder.
- Open Application Support folder, search for the files related to OneDrive, and then trash all the target files inside the folder.

- Back to the Library, select and open Preferences folder, and delete every file associated to OneDrive.

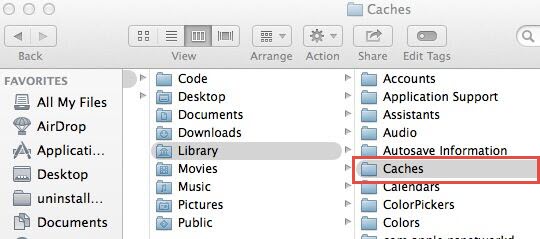
- Again, come back to the Library, head to the Caches folder, and trash the OneDrive remnant files inside the folder.
Step 4: Empty Trash.
- Right click on the Trash icon and then select “Empty Trash”, and then confirm your act. Note that you have to check the files in your Trash before you clean up the Trash in case that you will delete something important for good.

You can also type OneDrive in the search box in the Library interface, and then search all files in your Mac. And then you can find out the folders and files related to OneDrive at once.
Steps to remove OneDrive via Launchpad
It seems there are many users who tend to use the Launchpad to remove OneDrive with the following steps.
- Click on the Launchpad icon in the DOCK
- Click and hold on the OneDrive icon until it wiggles and showing a cross icon
- Click on the cross icon on OneDrive icon and the program is gone.

It is convenient to remove OneDrive or any other program from Launchpad; however, you can’t always completely uninstall the unwanted applications when the unwanted program is not a packaged one. To ensure a successful and complete removal, you will need to go through the steps in the manual removal guide to delete the remnant files of OneDrive.
Considering the time-consuming manual uninstallation, you can choose an easier way to help you thoroughly remove OneDrive from your Mac.
A shortcut to remove OneDrive in Mac OS X
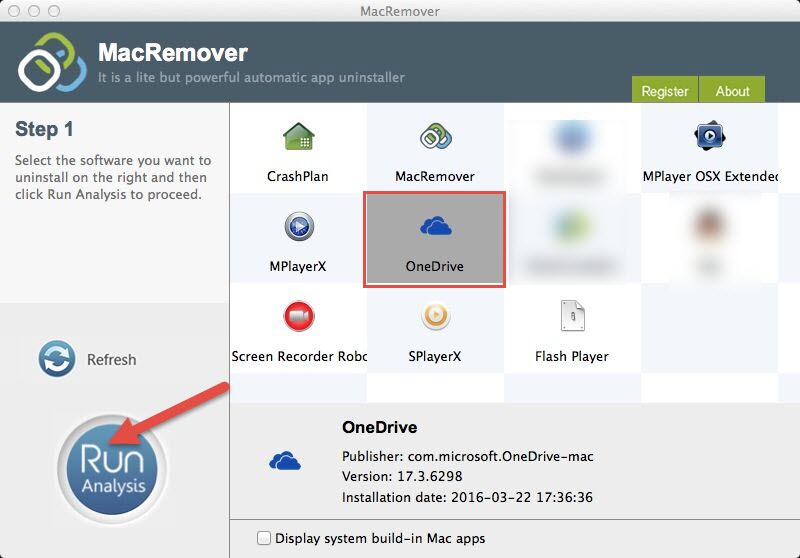
Compared with the complicated traditional uninstallation, this approach can be described as a shortcut, or an automatic method, which relies on a smart third party uninstaller. You can easily perform the removal of OneDrive with a few clicks in seconds like this:
- Step 1: install and activate the uninstaller
- Step 2: Highlight the OneDrive icon in the main interface, and then select “Run Analysis”.
- Step 3: Click on the “Complete Uninstall” button and then select “YES” to confirm your performance.
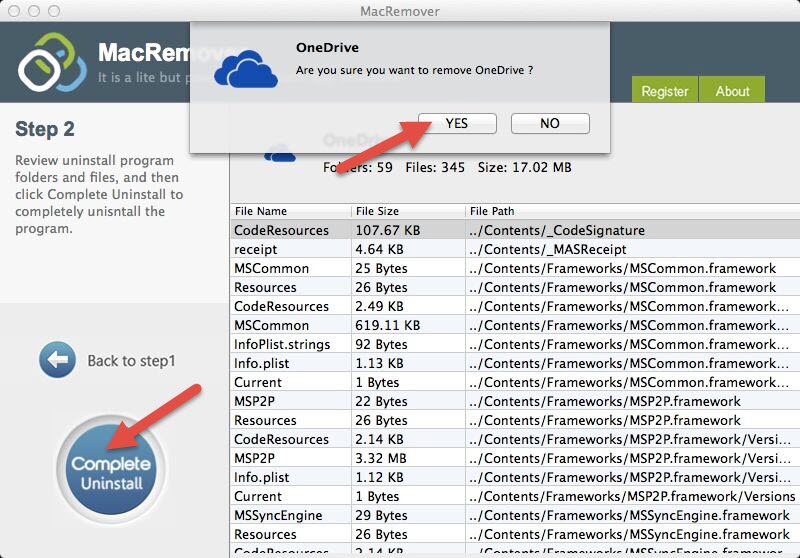
That’s all the instructions you need to follow to remove OneDrive automatically. Different from the typical way, the uninstaller enables you to carry out the uninstallation as well as get rid of all the components of OneDrive during your performance, which makes Mac removal a simple job.
Improper uninstallation can cause various troubles for your Mac computer such as:
- Your Mac runs slowly after remove OneDrive
- Errors pops up with unknown reasons
- Can’t reinstall OneDrive after uninstall it
- Fail to uninstall OneDrive
- Mac crashes and freezes with the damaged files.
To avoid the issues like that, you have to carry out the correct and complete instructions when uninstalling. Or it is better to adopt the automatic way for it makes the uninstallation easier and suitable for both the average Mac users and the advanced Mac users. So, if you can’t remove OneDrive in Mac OS X, try this new way and you will be successfully to make it.